
노트북을 바꾸면서 github 인증을 다시 해야 했다. Token(토큰)과 ssh로 github를 인증하는 방법에 대해 정리 겸 본 글을 작성한다.
github 인증
git을 처음 사용하려고 하면 아래와 같이 username과 password를 입력하라고 요구 받는다.

username은 내 github 계정의 이름을 입력하면 되고 패스워드를 위해 토큰을 발급받아야 한다. ❌ 깃허브 계정 패스워드가 아니다. 21년 8월 13일부로 중단되었다.
Token을 통한 인증
Token 발급
github 프로필에서 상단 바의 본인 아이콘을 누르고 settings에 들어간다.
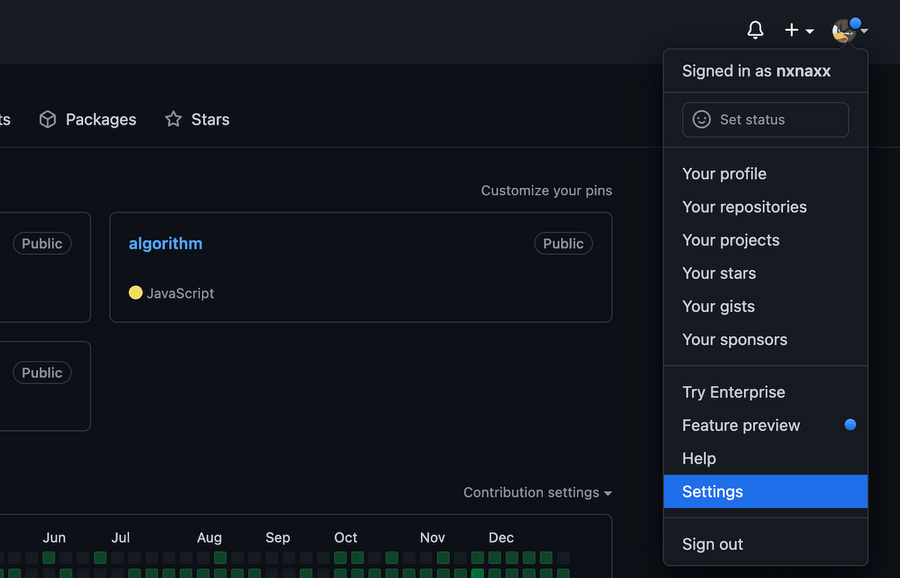
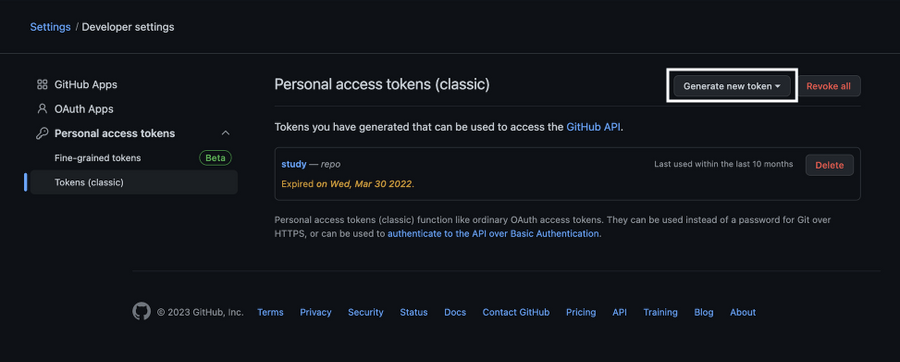
settings 메뉴 가장 하단의 developer settings에 들어가 token 탭의 Generate new token 버튼을 눌러 새 토큰을 생성하자.
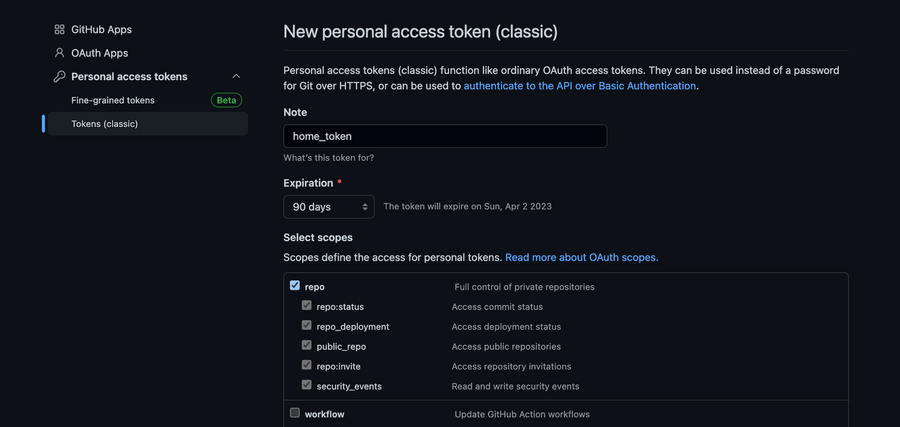
note는 원하는 이름으로 작성해주고 expiration도 원하는 기간만큼 설정해준다. 이 기간이 지나면 토큰이 만료되므로 재발급받아야 한다. select scopes도 적당히 설정해주고 완료한다.
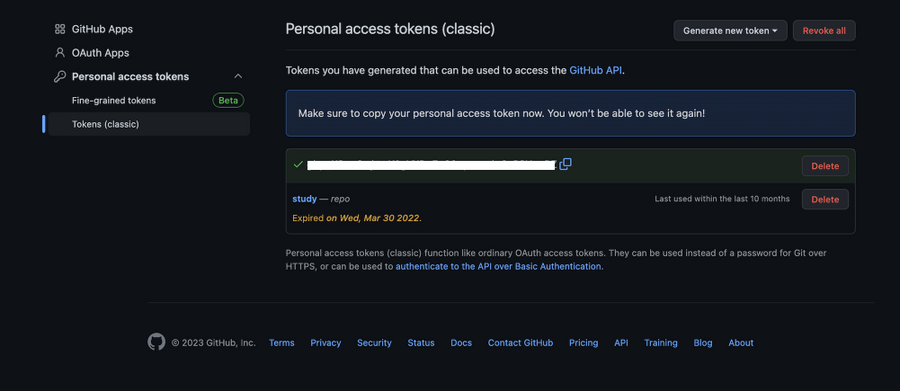
생성된 토큰을 복사해서 아까 터미널에서 요구한 password 자리에 붙여 넣어 준다. 패스워드는 입력해도 보이지 않는다.

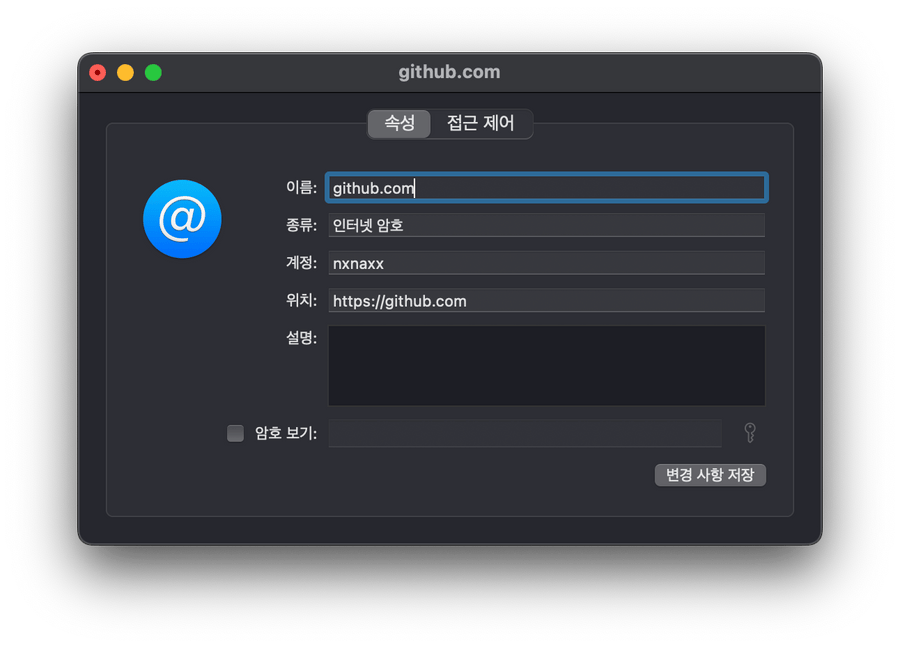
macOS의 경우 토큰을 변경하려면 키체인 접근에서 github.com을 들어가 맨 아래 암호를 변경해주면 된다.
SSH(Secure Shell)을 통한 인증
SSH(Secure Shell)
ssh는 두 대의 컴퓨터 간의 데이터를 공유할 수 있도록 하는 네트워크 통신 프로토콜이다. 통신이 암호화되어 있기 때문에 안전하지 않은 네트워크에서 사용하기에 적합하다는 특징이 있다.
관리자가 원격으로 시스템 및 응용 프로그램을 관리하는 데 널리 사용되고 한 컴퓨터에서 다른 컴퓨터로 파일을 전송할 수도 있다.
ssh key 생성
터미널에 아래 명령어를 입력한다. "your_email@example.com"에는 github 이메일 주소를 넣어준다.
$ ssh-keygen -t ed25519 -C "your_email@example.com"
아래 내용이 뜨면 엔터를 눌러 해당 경로에 key를 저장한다.

Enter passphrase (empty for no passphrase): Enter same passphrase again:
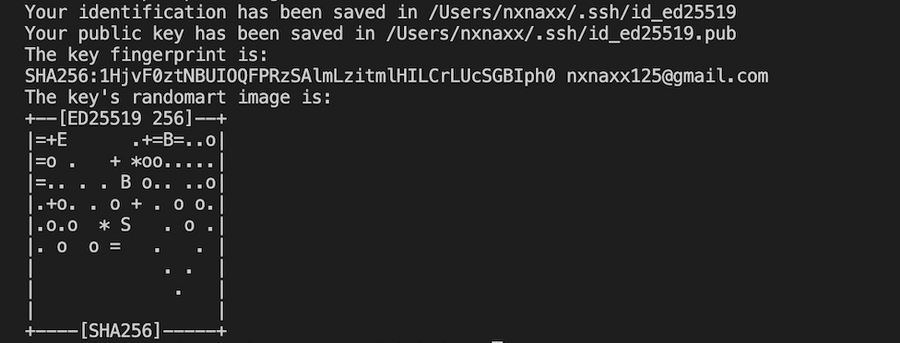
비밀번호를 설정해주면 ssh key 생성이 완료된다. ~/.ssh/id_ed25519에 private key가 들어있고 ~/.ssh/id_ed25519.pub에 public key가 들어있다.
❌ public key는 공개해도 되지만 private key는 공개하면 안 된다. ❌
github에 ssh key 추가
아래 명령어로 공개 키를 확인할 수 있다. 전부 복사해준다.
$ cat ~/.ssh/id_ed25519.pub
macOS에서는 pbcopy를 사용해 바로 복사할 수 있다.
$ pbcopy < ~/.ssh/id_ed25519.pub
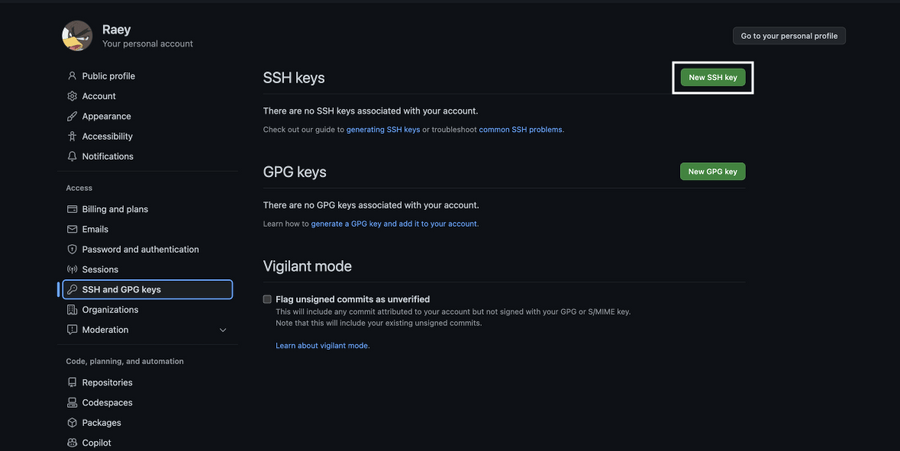
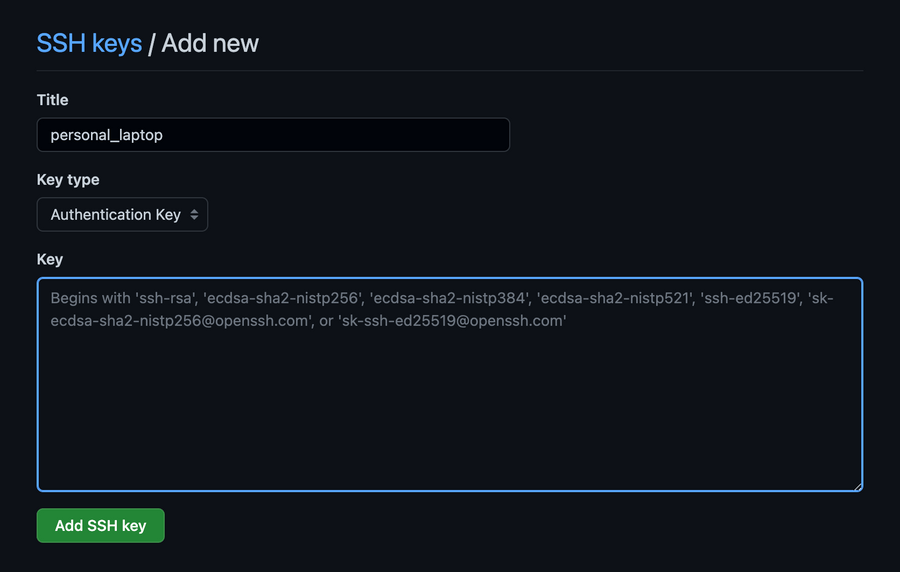
github settings에 들어가 SSH and GPG keys 탭의 New SSH key 버튼을 클릭한다. Title은 원하는 이름으로 설정하고 key 칸에 복사한 공개 키를 붙여 넣는다.
ssh 연결 확인
github에 등록까지 했으면 내 pc와 연결이 잘됐는지 확인해보자. 아래 명령어를 입력한다.
$ ssh -T git@github.com
Hi {username}! You’ve successfully authenticated, but GitHub does not provide shell access.
ssh 암호 저장
Enter passphrase for key …
ssh를 사용하면 push와 같은 작업을 할 때마다 암호를 입력하라고 한다. 이게 귀찮으면 keychain에 암호를 저장하도록 할 수 있다.
먼저 백그라운드에서 ssh-agent를 실행시켜준다.
$ eval "$(ssh-agent -s)"
편집기로 ~/.ssh/config를 열어 아래 내용을 추가한다. 파일이 없으면 만들어준다.
$ touch ~/.ssh/config
or
$ vi ~/.ssh/config
Host *.github.com > AddKeysToAgent yes > UseKeychain yes > IdentityFile ~/.ssh/id_ed25519